Wish Upon a Party

Wednesday 8 April 2015

Sleeping Beauty Birthday Cake

Dolly Varden Birthday Cake


Having a special birthday cake for your little princess does not have to be an expensive venture.  Making a dolly varden birthday cake is much easier than you think.  I am by no means very good at cake decorating or cooking in general but I love giving things a try.  I have found that no matter what mistakes you make using fondant icing it can be covered up.  


What you will need

Dolly Varden tin (bought or hired)
Doll
Cake stand
2-3 cake packets (additional eggs, butter milk as required on packet)
Fondant icing 
(Fondant icing can be found at cake supply shops, 
Kitchen Warehouse if you are in Perth WA, 
Woolworths now sell small quantities)
Rolling pin
Mat 
(I use an old tupperware pastry mat)
Knife
Baking paper
Clingwrap
Frill cutter
Small flower cutter
Edible metallic lustre
Sugar glue (optional - can use butter icing)
paintbrush (used only for cake making)
cachous balls (cake decorating balls)
Ready made butter icing


First, start by buttering the tin and line with baking paper.  This can be a bit tricky with the shape but just cut paper into strips and place in a ring, one overlapping the 
other until you reach the top.

I just used a 2 $3 packet cake mix.  I probably should have used 3 as the dress was a bit short. Follow the instructions. Bake and allow the cake to cool.

Wrap the legs and dress of the doll in cling wrap.  Trim the cake so it has a flat bottom and shave off the hardened edges of the cake. Cut out the centre and sit the doll in the cake. 


As I had not placed enough cake mix in the tin, I had to build up to the waist of the doll with butter icing. The skirt should puff out from the waist but if it doesn't just build up with icing over the cling wrap like above. Spread the butter icing over the rest of the cake.


I used some white fondant first, rolling it out to about 3mm thickness. I have not been very successful at rolling out large amounts of fondant without it tearing so I decided to layer the skirt in panels.  I laid a layer of white down the centre front and placed 2 panels 
either side in dark pink.


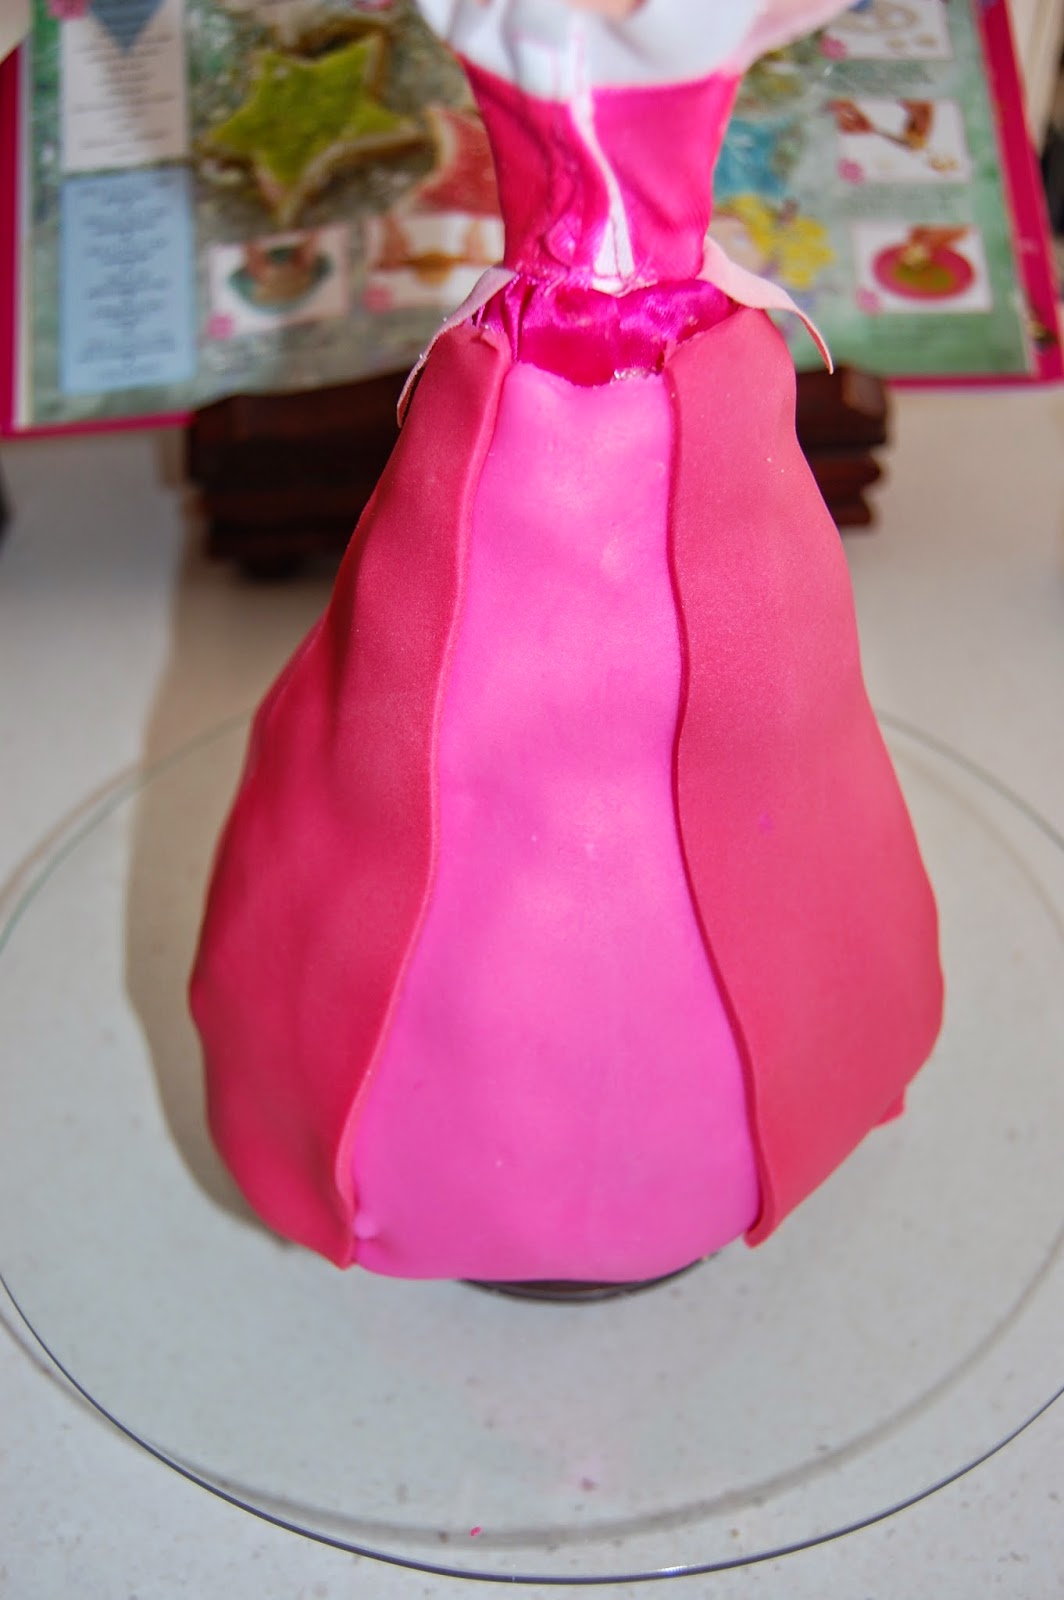
I had placed a layer of lighter pink on the back of the skirt prior to placing the side panels.


Using the frill cutter I cut out a circle and then cut the circle in half to start making a frill placing on the bottom of the skirt.


Then cut more frill for the panels.


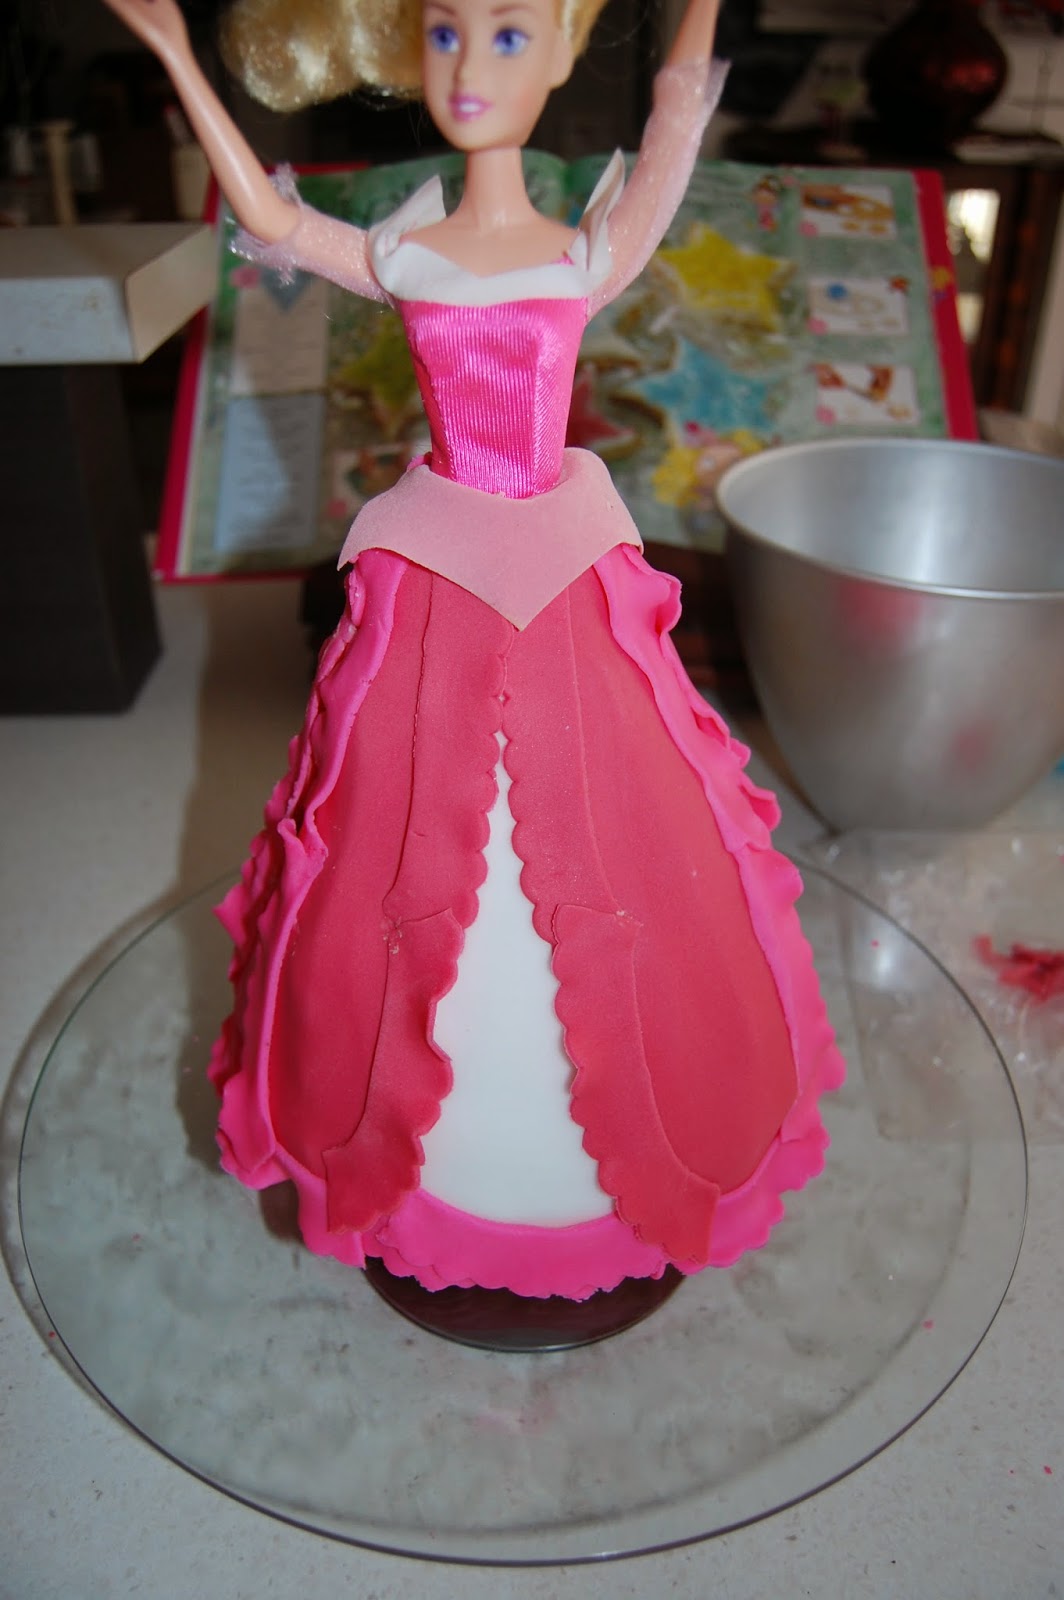
Then for the back of the skirt also.


I had pre cut some little flowers and stuck a ball to the centre.  I had some sugar glue to stick the balls which can also be bought from cake supply shops but I also used the butter 
frosting to stick some. 
Allow the flowers to harden.


Using the sugar paste or icing, stick the flower to the joins of the frills.


Using a small paint brush, dust on the metallic lustre.  
I used gold.


Decorate the stand with a few gems and pearls and place on your cake table.


She may not be shop perfect but your little girl with still be delighted.

My own daughter's reaction was 
"She is so adorable!!".


Monday 26 January 2015

Oriental Tea Party


This is Ellie's 6th birthday party.
Her inspiration for wanting an oriental tea party was 
Japanese Bobble Art Dolls


The Oriental Garden


What can be more perfect for an oriental garden than a butterfly bridge.


I have a collected oriental umbrellas over the years.  They have been placed them in a metal stand.

 Perfect for Chinese Princesses to use strolling over the butterfly bridge.


Several trees were placed around the party area filled with blossom stems and coloured lanterns.


I came across some curtains in an opportunity shop that were covered with 
blossoms in the perfect colours for this theme.  I made them into table runners.  
The flower windmills have been plastered into plastic pots making them perfect weights for outdoor parties.


These ceramic dolls were found at The Reject Shop.


The potted flower windmills were also used around the garden.


These items and more are available for hire at Wish Upon a Party in Perth.
For pricing and inclusions, please go to:


Thursday 8 January 2015

Party or Summer Holiday Activity - Play Doh Sundaes, Cookies & Cupcakes


I came across this idea from a blog called Happy Hooligans, craft and activities for little people.


This activity is a great idea for a party activity.  I loved the idea of making playdoh that was scented and coloured to resemble ice cream or cookie dough.
Weeks prior to making the dough, I began collecting ice cream scoops and sundae containers from thrift stores. I also gathered beads, balls, cupcake toppers, shells, gems, glitter and anything that resembled sundae toppings.  I decided on 3 "flavours", Spearmint, Cookie Dough and Chocolate.  

For the chocolate I follow the following recipe taken from another lovely blog called The Imagination Tree:


I used the following recipe for the other doughs and coloured them pink and green with 
scents of spearmint and vanilla. They all smell divine.Being a no cook dough, it is very quick to make.

The containers were bought from The Reject Shop and are shaped like ice cream tubs. 

Now the creations can begin


Sundaes


I collected cupcake trays and coloured silicone cupcake moulds to make cupcakes.


Chocolate Bread Men.


Tropical Sundaes


Chocolates placed in a gold chocolate tray


Goodies for a Sundae Shop.


Set up a toy register for the goodies to be sold.

This is also a good activity to practise money handling for older children.


Wednesday 7 January 2015

Sleeping Beauty


I am with Flora on this one.  Make it Pink!!
This party package has been put together for little girls who love the story 
Sleeping Beauty using the colours hot pink and gold.


The royal table is set with vases of hot pink blooms.


Sleeping Beauty's gown on a mannequin.


The table setting within the royal garden.


BPA free, eco friendly princess cups are used in this party package.

These items are available for hire at www.wishuponaparty.com.au

Saturday 29 November 2014

Taffyta Muttonfudge Costume


My daughter attended a party this year and insisted that she just had to dress up as the Wreck it Ralph character Taffyta Muttonfudge.  I only had a couple of weeks to put something together so I hit my local thrift stores to hopefully remodel some finds rather than buying fabric and starting from scratch.  I was so lucky to find a child size horse riding helmet for around $6.  I could not believe my luck to find something so similar to the shape I needed for the motor racing helmet.  I already had some pink lycra, green crepe and pink taffeta in my stash of  fabrics.  I found an adult sized striped t-shirt  and a fleece zip up jacket to cut up. 


THE HELMET


I cut triangles of fabric, enough to cover the helmet and after sewing into a circle 
I stretched it over the helmet.


After ripping out the lining and unscrewing the cap, I tacked the lyra to the velvet on the inside of the hat.


I traced around the peak of the helmet and cut a piece of green crepe to size.  


The tip of the peak was machine sewn and tacked by hand to the lycra.  I hand sewed a band of fabric cut on the bias to cover the join. I was not quite happy with the finish of the peak but time was against me.


I machine sewed some strawberry leaves and attached them under the cap.


I then  reattached the lining by hand.


For the strawberry pips I just used jewel stickers.


THE DRESS


I don't have any pictures of the construction of the rest of the costume however it was very simple.  I traced around a simple dress on butcher paper to make a pattern.  I cut out a back and front, overlocked, stitched together and hemmed.


THE PANTS


There was not enough fabric in the t-shirt to make the pants so I used the left over lycra to make the knickers.  Once again I traced around a pair of leggings folded with the crease down the front of the pants.  I cut the top of the pattern to use for the knicker pattern and the base for the legs.  Then cut out out from the t-shirt and lycra and sewed together.  I made a hem and threaded through some elastic at the waist.


THE JACKET

I found an old fleece jumper and cut of the arms off and made some taffeta arms instead and reused the old cuffs.  I did this as the jumper was a bit worn.  Then I added a stripe of white down each side of the zip and cut out a collar from the cream crepe.  Then a band of taffeta at the bottom of the jacket .


I bought a long white wig from Gone Bazaar in Canning Vale and cut into a bob.


A little bit of makeup. 


And we are ready to go!