Wish Upon a Party

Saturday 29 November 2014

Taffyta Muttonfudge Costume


My daughter attended a party this year and insisted that she just had to dress up as the Wreck it Ralph character Taffyta Muttonfudge.  I only had a couple of weeks to put something together so I hit my local thrift stores to hopefully remodel some finds rather than buying fabric and starting from scratch.  I was so lucky to find a child size horse riding helmet for around $6.  I could not believe my luck to find something so similar to the shape I needed for the motor racing helmet.  I already had some pink lycra, green crepe and pink taffeta in my stash of  fabrics.  I found an adult sized striped t-shirt  and a fleece zip up jacket to cut up. 


THE HELMET


I cut triangles of fabric, enough to cover the helmet and after sewing into a circle 
I stretched it over the helmet.


After ripping out the lining and unscrewing the cap, I tacked the lyra to the velvet on the inside of the hat.


I traced around the peak of the helmet and cut a piece of green crepe to size.  


The tip of the peak was machine sewn and tacked by hand to the lycra.  I hand sewed a band of fabric cut on the bias to cover the join. I was not quite happy with the finish of the peak but time was against me.


I machine sewed some strawberry leaves and attached them under the cap.


I then  reattached the lining by hand.


For the strawberry pips I just used jewel stickers.


THE DRESS


I don't have any pictures of the construction of the rest of the costume however it was very simple.  I traced around a simple dress on butcher paper to make a pattern.  I cut out a back and front, overlocked, stitched together and hemmed.


THE PANTS


There was not enough fabric in the t-shirt to make the pants so I used the left over lycra to make the knickers.  Once again I traced around a pair of leggings folded with the crease down the front of the pants.  I cut the top of the pattern to use for the knicker pattern and the base for the legs.  Then cut out out from the t-shirt and lycra and sewed together.  I made a hem and threaded through some elastic at the waist.


THE JACKET

I found an old fleece jumper and cut of the arms off and made some taffeta arms instead and reused the old cuffs.  I did this as the jumper was a bit worn.  Then I added a stripe of white down each side of the zip and cut out a collar from the cream crepe.  Then a band of taffeta at the bottom of the jacket .


I bought a long white wig from Gone Bazaar in Canning Vale and cut into a bob.


A little bit of makeup. 


And we are ready to go!


Friday 28 November 2014

Cinderella Party


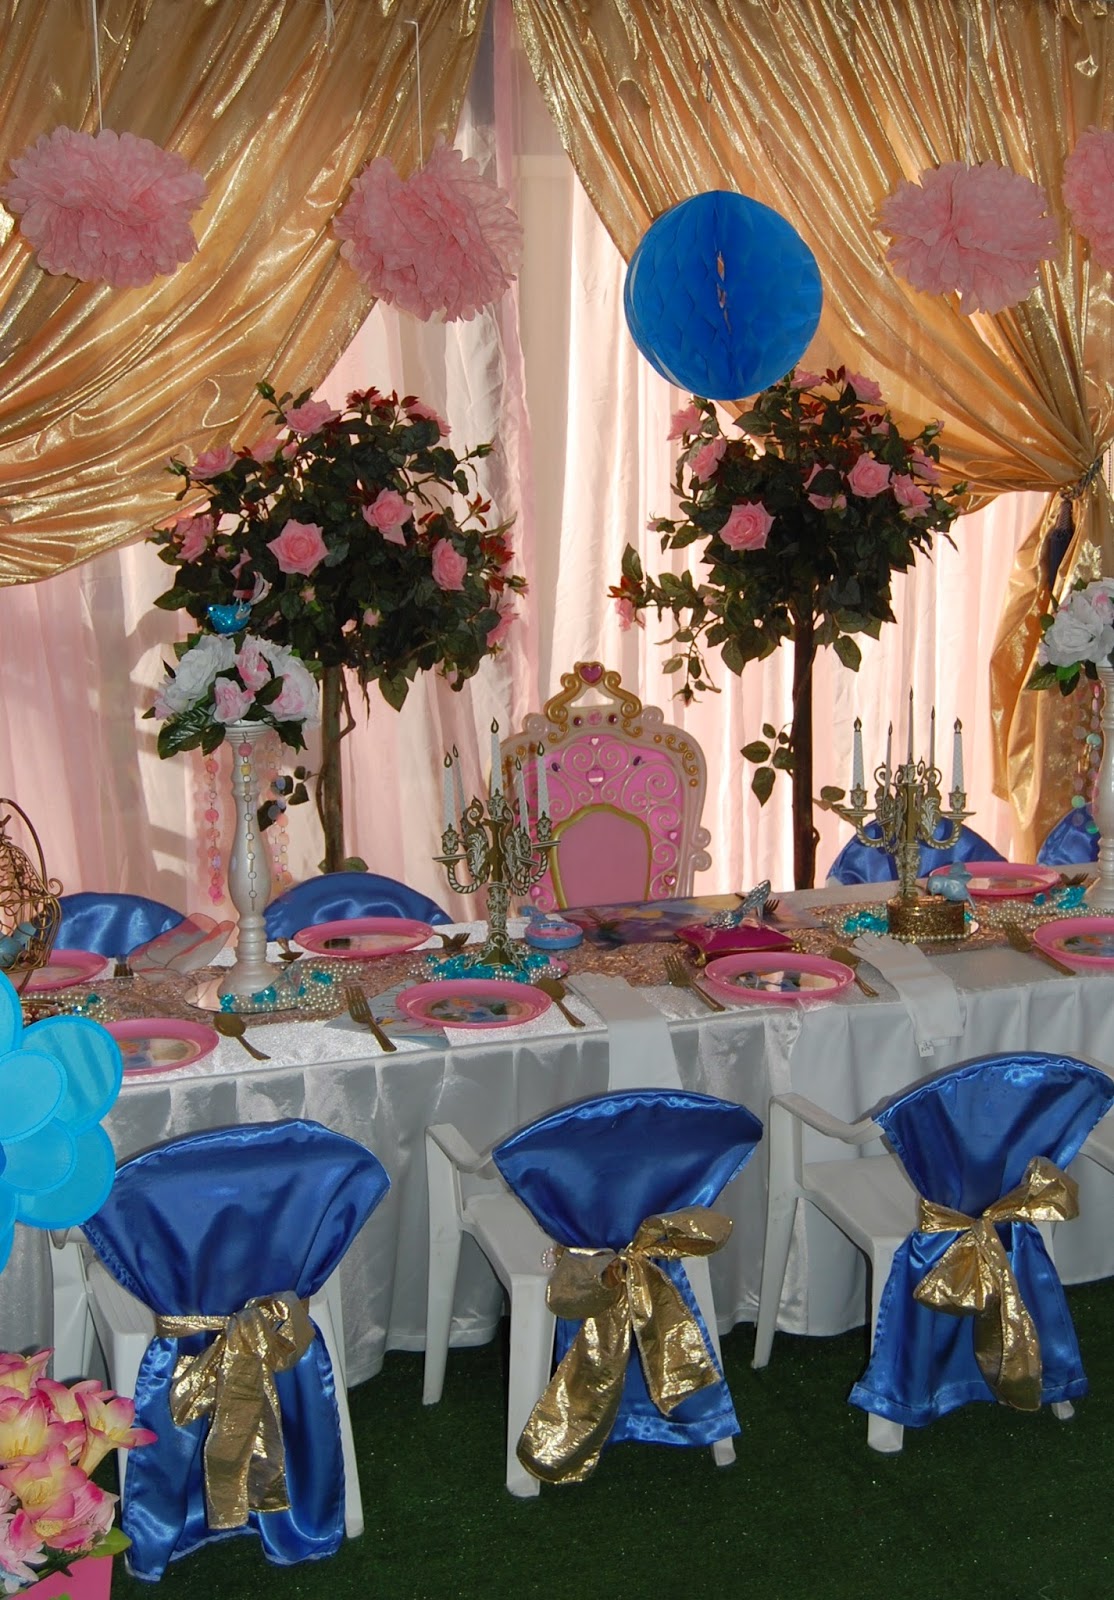
Out of all the Disney princess movies, my daughter first adored Cinderella. Disney's new version of Cinderella will be in theatres in March 2015.  

The following items have been put together in a package for hire for little princess who dream of 
carriages and glass slippers and being a princess on their birthday...


The story of Cinderella would have to be the catalyst to all little girls with an obsession of shoes.
This glass slipper table decoration lights up with a magical sound when you press the slipper.


Regal blue chair covers with gold sashes.
These chairs suit up to the age of 8 years.


BPA free, eco friendly Cinderella plates are used in this themed package.


A Cinderella gown complete with choker on a mannequin stands in front of a pink 
lemonade stand which also comes in blue and white


More miniature glass slippers.


Gold drapes frame the setting.  
This package comes with 10 chairs including the throne.
It can however comfortably seat up to 14 children.


A tiny blue bird sitting in a cage.

These items are available for hire in Perth, Western Australia at


Saturday 22 November 2014

Sugar Plum Ballerina


With Christmas fast approaching, I could not help but be inspired by the story of The Nutcracker.  This time each year in my home, the movie Barbie in the Nutcracker is brought out and the twirling begins! What little girls does not dream of being a Sugar Plum Princess. I cannot help but indulge them.


I came across this gorgeous pink and gold brocade fabric in a thrift shop which became the basis of the colour scheme. I sewed the brocade to make these stunning table runners.  I have a personal love of all things polkadot.


I love these beautiful soft lilac ballerina's with their pom pom skirts.  They float so gracefully above the table setting.

Regal touches of gold with the sashes and candelabras.


This ballerina lemonade stand comes as an additional upgrade with the hire of the Sugar Plum table setting...... to make things all the more sweeter.

You can find these items available for hire in Perth, Western Australia at

http://www.wishuponaparty.com.au/#!sugar-plum-princess/c1iyu


Saturday 15 November 2014

Frozen Decorations for Stage Settings


Like many mothers of little girls, I could not help being drawn into the magic of the Disney movie Frozen. So I was delighted when I was approached through a mutual friend to set up a Frozen stage setting for a school social event. The request came after I posted on my Facebook page a Winter Wonderland picture from a previous Christmas set up done for a Christmas function.


 I would have to say it was probably one of the most fun set ups I have ever been requested to do. I just love the excitement and curiosity of children and listening to all the comments and ooohs and aaaahs.    It makes all the loading, carting and set up time worthwhile. 


I love the process of seeing something come together.


These gorgeous honeycomb spheres were purchased from The Reject Shop.  They hang from the willow branches of my handmade trees.


I set out to find items to make an ice fountain.  I really wanted to make a large one but carting would have been an issue.  So I found some plastic bowls from Bunnings along with some plastic garden pots. Then I went to the paint section and bought some small sample pots of paint that were on the mistinted rack.  They are great for little craft projects.  After painting a sealer/binder and a couple of coats of base paint, I sponged a coat of white using a sea sponge.  I also purchased some clear silicone and a silicone gun.  I wanted the fountain to have an ice crystal look.  I found bags of  clear plastic crystals from Red Dot and siliconed them to the edges of the bowls.  I plastered a cardboard tube into a small plant pot at the top of the fountain for the "spray" to sit into.  This was found at a local party shop for around $5.
To make the fountain glow I used 3 battery operated lights covered with transparent white fabric.  I had intended to use blue cellophane but the fabric created a softer look.


I love creating magical ponds.  I used to use mirrors but I am always taking into consideration safety.  This pond is created by using layered fabric edged with foliage.  Battery operated lights sit underneath the shear fabric and can be set on either the flash setting to look like flowing water, or left to just glow.


Placed inside the water lily is a flower light which flashes different colours.


Unfortunately, I cannot take credit for this amazing Olaf.  He was made by Cate from South Coogee and is made from plastic bags and tape.  I am in the process of making my own large Olaf substituting the inner plastic bags for foil so Olaf can be moulded to sit easier.  However, I don't think he will turn out half as good as this.


These items are available for hire at http://www.wishuponaparty.com.au/#!frozen/c38i